User Permissions
The User Permissions DocType is designed to refine and control access to specific data within TechMaju on a per-user basis, complementing the broader role-based permissions.
Understanding the User Permissions DocType
Purpose: To restrict or allow individual users to access particular records or documents within the system. This tool is essential when specific data visibility needs to be controlled beyond the scope of role permissions.
Function: It serves as a detailed layer of access control that can be applied to users, allowing organizations to manage permissions with granularity. It ensures that sensitive information is only accessible to authorized users.
Role Required
System Manager
Step-by-Step Instructions for using the User Permissions Doctype
Initiating New User Permission
Navigate to User Permissions: Access the User Permissions interface from the User module.
Create New Permission: Click on the option to create a 'New User Permission', which should open the form displayed in the screenshot.
Completing the User Permission Form
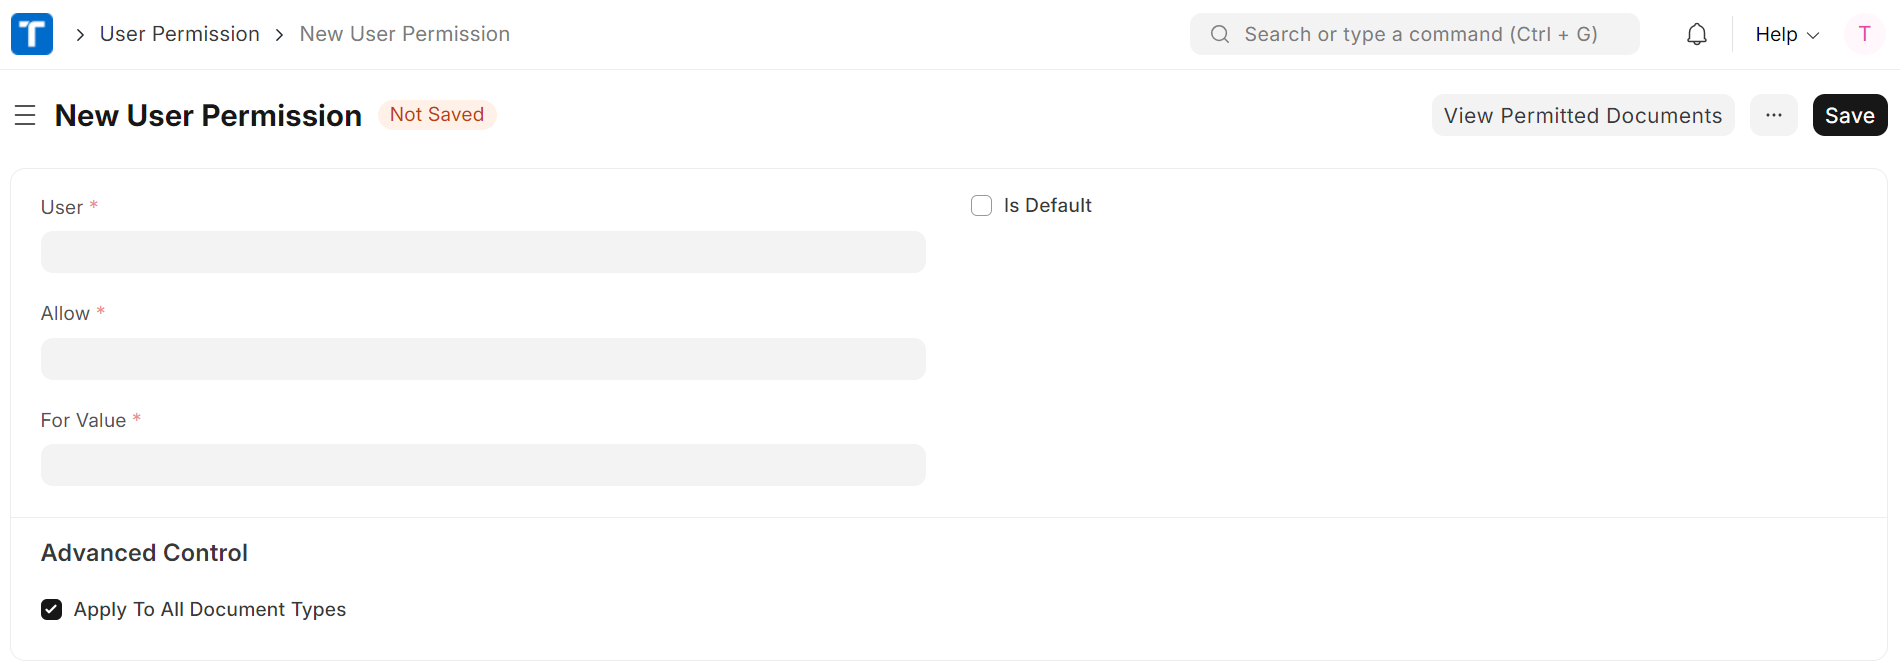
Specify the User:
In the 'User' field, enter the name or email of the user for whom you are setting the permissions. This field identifies the user account that the permissions will apply to.
Define the Permission:
Under 'Allow', select the DocType that the user will have permissions for. This determines the scope of documents the user can access.
Determine the Scope:
In the 'For Value' field, specify the particular record or value within the DocType that the user is allowed to access. This field may refer to specific IDs, names, or values depending on the DocType selected.
Set Advanced Controls (if applicable):
If the permission should apply to all document types, tick the 'Apply To All Document Types' box. Use this option with caution as it significantly broadens the scope of access.
'Applicable For' might be used to refine the permission further to certain conditions or scenarios, although this is not visible in the provided screenshot.
Make Permission Default (optional):
If this permission should be the default setting for the user, check the 'Is Default' option.
Save the Permission:
Once all fields are filled in, click 'Save' to apply the new user permission.
Review Permissions:
After saving, it’s recommended to review the permissions by clicking on 'View Permitted Documents' to ensure they have been set up correctly.
Best Practices
Always verify the correct user and document values before saving the permission.
Use the 'Is Default' option judiciously, as it can override other individual permissions.
The 'Apply To All Document Types' option should be used sparingly and only when necessary, as it can grant broad access.
By carefully utilizing the User Permissions DocType, administrators can create a secure and efficient environment where users can access the data they need for their roles without exposing unnecessary information, thus maintaining data privacy and compliance.